Scaffolding approach to tackling
Using educator Nick Hart’s approach, RCW editor DAN COTTRELL looks at the method of slowly building up support around a player as they learn a new skill.
’Scaffolding’ in coaching refers to building support around a task as it is introduced and built up - you then take away the scaffolding as the player becomes confident and competent in what is being taught.
The term was first coined in the late 1970s and we probably use a number of elements of this approach in our own coaching (see graphic, below).

Some of the scaffolding techniques that Nick Hart sets out here are more appropriate to the classroom than the rugby field, though it is easy to see how we could adapt them to our training needs. However, I won’t delve into graphic organisers or oral rehearsal with an adult, during on-field practice.
This article will look at how to use the approach to teach tackling. But before we start, let’s double-check what scaffolding is not, with the help of a checklist written by Nick Hart, a headteacher and author of the blog, ThisIsMyClassroom:
- Creating different tasks for children
- Making the work easier
- Catering for a perceived learning style
Scaffolding is about adapting a challenging task to enable success. For example, a tackle could start with just being able to get close to a ball carrier. If the player is successful in that, we move to the next level.
Scaffolding also reduces the cognitive load, meaning a player only focuses on one or two movements rather than the whole - for example, getting the feet close to the ball carrier. If a player has too many elements to focus on, they will not do any of them well.
Using scaffolding strategies
Tackling requires a mix of skills and mindset - skills are techniques performed under pressure, while mindset is the desire to want to tackle.
They are interlinked because the confidence to tackle often comes from knowing the best way to tackle.
Building up a skillset to tackle should not only improve outcomes, but it should also help those players who shy away from tackling.
Crucially, scaffolding should reduce injuries because the players are taking contact skilfully and when it is appropriate to do so.
Break tasks down into small chunks
Tackling skills require a number of techniques to work simultaneously: footwork to get close and head position tight to the ball carrier and in a safe position - with strong grip and leg drive - to complete the tackle.
In training, you could work on each aspect with all of your players, not just those who are less able.
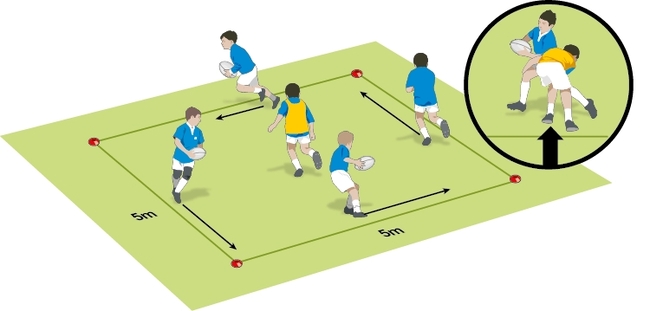
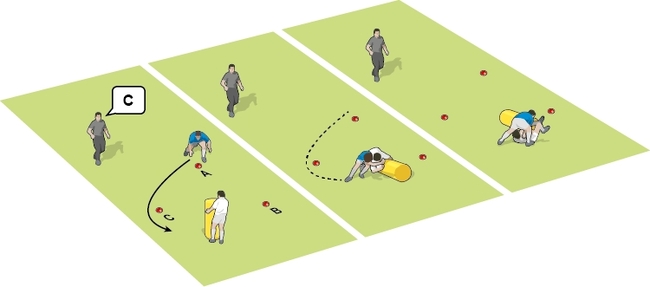
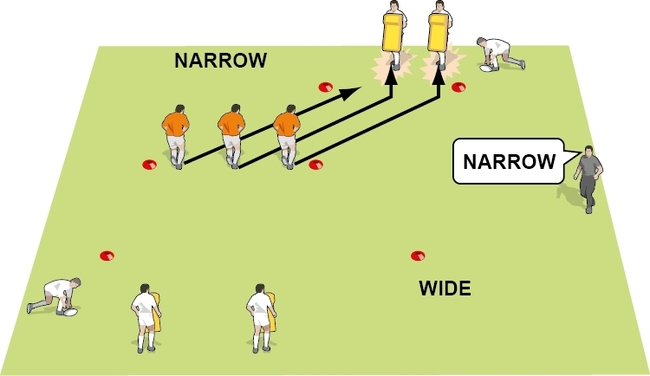
For example, you could use ruck pads to help the player to get close; walking rugby to practise getting the head in tight; and grab-tackle touch for strong grips.
These activities should give players plenty of chances for success, but you must explain why you are focusing on the aspect, in the context of the whole tackle.

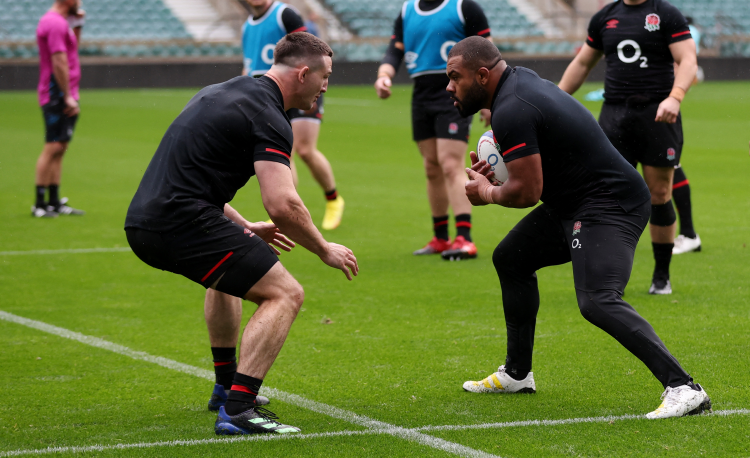
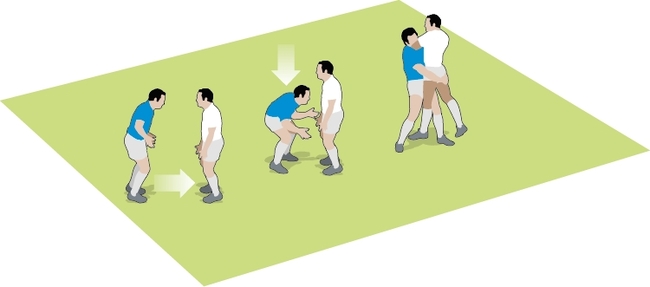
This is a great demonstration of a good tackle: eyes on the target, trying to get the foot in close (left) and then a strong wrap and leg drive to bring the player to the ground (right).
Allow time to practise automatically
To use a buzzword, ’automaticity’ means that a player can perform a task without thinking. That requires a certain amount of repetition which, ideally, is slightly different each time.
For tackling, it could be practising with different players; arriving from slightly different angles; or at slightly different speeds.
This could be achieved through low-impact, warm up-type tackling tasks such as tackling on the knees.
Give sufficient time to process instructions and work on tasks
Clear explanations, especially with tackling, are crucial for safety. But how long do we give players to process instructions?
Ask questions to check for understanding. Use slow-mo demonstrations, and then slow-mo run-throughs, to give players more time to process. Also, practise with familiar exercises, with small additions each time.
Don’t expect players to pick up a skill in a short period of time - return to it over a number of sessions.
Prioritise understanding over task completion
Nailing a technique is a performance outcome, not a learning outcome. It takes time for players to embed good habits.
Their tackle performance may not be perfect, or even close to it. However, check that they can explain, or even slow-motion demonstrate, what they should be doing.
For example, what does a tight grip look like? Where does the head need to be? Do all the players show this understanding, not just those willing to answer questions?
Use concrete/pictorial representations
Demonstrations before and after the exercise are ideal for showing the players good practice.
Use ’backwards chaining’ - starting with the end product and working backwards, step-by-step - to illustrate the finishing position of a tackle.
"Use ’backwards chaining’ to illustrate the finishing position of a tackle..."
This helps players understand and learn what a good tackle looks like and what to aim for.
Pre-teaching interventions
If you are introducing tackling or a type of tackling, why not send out the key information - like what key points you are going to concentrate on, or pictures of a good tackle - beforehand, via social media or messaging?
With younger players, showing adults tackling isn’t effective because they won’t picture themselves making the tackle - instead, diagrams of good tackling might be a better idea.
This helps reduce new information at the point of training, and allows reflection and possible questions ahead of the activities.
Always take safeguarding measures into account when communicating to under-18s.
Use partially completed examples
Why not start with the tackler already in contact with the ball carrier? Perhaps they can have one hand, gripping the shorts, or the head and shoulder in contact with the side of the ball carrier.
Another way is to have the players on their knees, although this removes the leg drive element.
Use minimally different scenarios
Players repeat the exercise but from the point of view of slightly different scenarios. Repetition without repetition is a good way to give players a better understanding of the decision-making processes in a tackle, such as where to put the foot; when to dip; when to engage; and how hard to grip.
Mix up the exercise you are using by varying starting points for the ball carrier and tackler.
For example, the ball carrier can be in front of the tackle, one or two steps to the side, on the left or on the right. This is only a minimal change, but enough to make the tackler have to slightly adjust.
They still need to go through the tackle process - get close, with head in tight and in the right position, grip tight and drive through - or let the ball carrier’s momentum do the work.
Related Files
Newsletter Sign Up
Coaches Testimonials

Gerald Kearney, Downtown Las Vegas Soccer Club

Paul Butler, Florida, USA

Rick Shields, Springboro, USA

Tony Green, Pierrefonds Titans, Quebec, Canada
Subscribe Today
Be a more effective, more successful rugby coach
In a recent survey 89% of subscribers said Rugby Coach Weekly makes them more confident, 91% said Rugby Coach Weekly makes them a more effective coach and 93% said Rugby Coach Weekly makes them more inspired.
Get Weekly Inspiration
All the latest techniques and approaches
Rugby Coach Weekly offers proven and easy to use rugby drills, coaching sessions, practice plans, small-sided games, warm-ups, training tips and advice.
We've been at the cutting edge of rugby coaching since we launched in 2005, creating resources for the grassroots youth coach, following best practice from around the world and insights from the professional game.
